You can buy a horizontal bar for your home, or you can make it from scrap materials.Here are some ideas on how to easily and cheaply make a horizontal bar for your home:
The horizontal bar is good for the comprehensive development of the body, almost all pulling and pressing muscles of the torso. Biceps are pulling muscles. Therefore, all types of pull-ups will help you develop your biceps. But not only them. On the horizontal bar, the latissimus muscles, trapezius, and rear deltoids will develop.
You will definitely have excellent biceps if you learn to do one-arm pull-ups at least once on the horizontal bar.
To avoid calluses when training, you can use gloves. Or just be patient and wait for them to harden.
To increase strength in your hands, use all kinds of finger hangs on the horizontal bar with additional weighting. This will increase your grip strength, especially when hanging from thick pipes. But brushes have a different kind of power.
For example, rotational strength, wrist extensor strength, wrist flexor strength. Here you can recommend a variety of exercises with weights, dumbbells, a roller (gymnastic roller), hitting a bag, and martial arts exercises.
If your goal is good tone, then these pull-ups will help a lot. In order for pull-ups on the horizontal bar to help build significant strength or mass, then you should hang a load from your feet, which must be gradually increased. In addition, it is believed that artificially limiting the amplitude of exercises does not have a very good effect on muscle shape.

To progress in strength and muscle, you should use special complicated exercises (like one-arm pull-ups), or hang additional weight on your belt.

Pull-ups until the back of the head touches the horizontal bar (pull-ups by the head) are usually performed with a wide grip.
Pull-ups until the back of the head touches (pull-ups behind the head) differ from regular pull-ups with a wide grip in the position of the body in the final phase of the movement (when the body is moved forward so that the head does not hit the bar). In this case, the shoulder parts of the arms are lowered exactly through the sides. It is this altered position of the body and arms that changes the impact on the latissimus dorsi, trapezius muscles, and small muscles of the upper back.
Petya grew up as a frail, unathletic boy. His parents persuaded him to do exercises, bought a horizontal bar, and secured it in the doorway. Dad showed me how to do pull-ups. But nothing helped - the boy still had no interest in sports.
Then mom challenged Petya to a competition. They hung a piece of paper on the wall with the words: “Mom”, “Petya”. Every day, the participants noted in their line how many times they pulled themselves up on the horizontal bar, squatted, and raised their legs in an “angle” manner. It was not necessary to do many exercises in a row, and, as it turned out, neither mom nor Petya could do this.
Petya began to vigilantly ensure that his mother did not overtake him. True, she also had to work hard to keep up with her son. The competition lasted for two months. As a result, the painful problem of physical education tests was successfully resolved.

In general, you can do whatever you can on the horizontal bar. And there is a direct connection here: the more you learn to pull yourself up, the more weight you will lose. In general, to lose weight, it is best to also do interval running or work on a cardio machine.

A couple of times a day, just go to the horizontal bar and try to pull yourself up. And it doesn’t matter that it won’t work out at first. Soon you will forget that you once hung and could not do anything. The fact that everything hurts afterwards is the norm.
To prevent your hands from burning, wear gloves: either special sports gloves or those sold in hardware stores (with rubber pimples).

There is no reason for people with scoliosis to avoid doing pull-ups in any form. This is a very suitable load for the back. On the other hand, pull-ups do not load certain muscles along the spine that need to be trained and whose uneven development is observed in scoliosis. Thus, pull-ups are good, but not sufficient.
On the first day, do exercises that primarily target your biceps and lats, and on the next, your triceps. chest and abs. For triceps and chest, push-ups from the bar are often used while resting on top of it.
The result of training, if it is really intense and focused training, is visible within a week. It manifests itself as an improvement in the tone of the muscles of the arms, latissimus muscles, and forearms. After about two to three weeks of pull-ups on the horizontal bar, you can already see a real increase in the biceps muscles, an increase in the latissimus muscles, an improvement in the abs, the muscles become noticeably more prominent.

How to breathe correctly when exercising on the horizontal bar?
Breathing on the horizontal bar - exhale with effort (pulling up, lifting legs, etc.)
The easiest way to learn how to do pull-ups is to try doing pull-ups every day. Exactly every day! It takes a long time to explain why this can help, but it helps a lot.
Another way is to use a special assisting simulator (a rubber band placed over the knee on a horizontal bar), which makes pull-ups easier. In it, you need to gradually reduce the tension, which helps you rise. Excess weight prevents you from lifting, you need to reduce it.
Rice. 4. Gymnastic wall

The gymnastics sports wall in the doorway (Fig. 4) requires 2 wooden posts, 14 solid wood locking inserts, 7 metal crossbars (pieces of pipe) and screws to attach the posts to the door jambs.
The dimensions of the parts are shown in the figure. Sockets and holes for screws are marked according to a template and made simultaneously in two racks, placed one on top of the other. The locking inserts at the ends of the crossbars are secured with glue.
To increase the strength of the liners on the outside, it is advisable to cover them with thin tin. After classes, the crossbars and inserts are removed, and the support posts are left attached to the jambs. The dimensions and diagram of a gymnastic sports wall for a sports corner, which can be made in an apartment, are shown in Fig. 4.
It has been noticed that children who have never had sports equipment at home do not know how to use them either at school or in the yard.
After all, only in a family will a child be protected, supported, and taught at first.
In addition, the home gym is at the disposal of children from morning to evening, which allows them to develop harmoniously.
It becomes possible to alternate sports activities with play and study, and have an active holiday with friends.
Of course, you can contrast a home sports complex with a school basketball or gymnastics section, but, firstly, one perfectly complements the other, and secondly, there is a big difference between these activities.
How to make your own DSK from plywood and shovel cuttings


The term children's sports and play complexes historically arose in 1971 with the invention of engineer V.S. Skripalev, who succeeded, after a visit to famous teachers B.P. and L.L. Nikitin, “after watching the children,” classified the groups of movements loved by children.
They boiled down to the iconic number 7: hanging, spinning, swinging, rolling, balancing, jumping, climbing; thanks to which the author of the invention was able to correctly arrange and connect separately hanging gymnastic equipment into a single logical whole, in which the child was able to move in three-dimensional space, the so-called “gymnastic tree” (V.S. Skripalev), which contributes not only to the harmonious development of all groups muscles, but also the intellectual development of a growing person.
Information support for this was the popular science documentary “The Longest Exam” (1977), where, along with innovative teachers Soloveichik, Nikitin, Volkov and others, 15 minutes of air time were devoted to the above product, the author’s unusual method for studying a foreign language language “from the cradle” and our family experience of “swimming before walking”.
This was followed by the invention of an outdoor sports pavilion, supported by the receipt of two Copyright Certificates (1978), issued after testing the first industrial design of VISTI; and, finally, writing an interesting, from a pedagogical point of view, book “Stadium in an Apartment” (1981), which was considerably shortened by Soviet censorship. As unusual ideas penetrated “the masses,” there were enthusiasts among instrument-making factories of manufacturers who changed the essence of the purpose of a children’s sports and gaming complex, violating, mainly, the very interconnected arrangement of the shells, which, in turn, gave them the opportunity to produce poorly similar samples under with your brand.
By the time the second “unabridged” author’s book “Our Family Stadium” (1986) was published, a good dozen official and “underground” factories were already riveting children’s sports complexes such as “Vertical”, “Carousel”, “Junior”, “Leader”, and also many other options in metal and wood.
A summer cottage is a place not only for farming, but also for recreation and sports, a moderate amount of which in your life will help maintain and strengthen your health. Various sports facilities at your summer cottage will help with this, where not only you, but also your grown-up children, as well as little ones, can exercise under your strict guidance.
A simple but effective design of a horizontal bar in the country
So, before you decide to install a horizontal bar with your own hands on your personal plot, you need to have a clear motivation. The following arguments in favor of a sports corner at the dacha in general, and a horizontal bar in particular, will dispel your last doubts about the advisability of installing them on the site.

If you have no doubts that you simply need a horizontal bar at your summer cottage, then let’s talk about what they are and how to make them yourself. Let’s say right away that they require special treatment, because they must not only be reliable and safe, but also attractive to children.
Variety of outdoor horizontal bars
First of all, you need to decide for what purpose you are installing the horizontal bar. If you need it in order to stretch the spine and relax the muscles after physical labor on the site, then it is enough to limit yourself to a regular crossbar on supports.
If you decide that you want to work on your physical fitness, then you should also add outdoor parallel bars to the bar.
 Outdoor horizontal bar design option
 In the case when you want to introduce the younger generation to sports, an outdoor horizontal bar and parallel bars will not be enough; a sports complex is needed here. Children's sports corners equipped with ladders, crossbars, spiral staircases, etc. will come to your aid.
It should be noted right away that you can buy an outdoor horizontal bar that is ready for installation, or you can make it yourself. In our article we will focus on the second option, i.e. we will look at how to make a horizontal bar at the dacha with your own hands.
Choosing a place to install a horizontal bar
Before creating a drawing of a future structure, it is necessary to decide on the choice of location for this structure. Here we recommend listening to the following expert advice:

So, let's summarize. It is most rational to place outdoor horizontal bars on a natural lawn in a shady place, on.
Basic parameters of an outdoor horizontal bar
The next thing you should pay special attention to is the dimensions and parameters of the future design, which will be displayed in the drawing. You need to know them, firstly, in order to correctly calculate and purchase the amount of building material, and secondly, so that the outdoor horizontal bar structure you erect is convenient for both adults and children.
So, let’s consider the average values of the main parameters of an outdoor horizontal bar:

As for the method of painting the horizontal bar, powder paint is preferable, because it is more resistant to aggressive environmental factors.
Tools and materials needed to make an outdoor horizontal bar
To make a horizontal bar, you need to stock up on the following materials and tools:

Algorithm for manufacturing a simple design of an outdoor horizontal bar

In this section, we will look at the rules for making the simplest horizontal bar design with our own hands - the U-shaped one. Having mastered these rules, you can easily build a horizontal bar of any complexity with your own hands, and even children’s sports complexes will be up to you. So let's get started.
The first thing to do is to dig holes for the bases of the support pillars. Their depth should be at least 0.6-0.8 m. It is these depth parameters that will make the design of the horizontal bar stable and reliable. The distance between the depressions in the ground must correspond to the width of the crossbar: for example, children's horizontal bars are made up to 1 meter wide, and adult sports bars are made up to 1.5 m wide.
 Ready poured foundation with installed horizontal bar
 In addition, before pouring the bases of the pillars with concrete, it is necessary to treat their bases: coat metal pipes with an anti-corrosion solution, and wooden pillars with waterproofing impregnation.
Then you can start attaching the crossbar. Several options are possible here. The crossbar can be attached to metal supports using a welding machine, or using bolts. Here the choice is yours.
 Ready installed and painted horizontal bar at the dacha
 The crossbars are attached to wooden posts exclusively using hardware, but the fastening itself can be top or side. The most common option for attaching the crossbar is the top one. In this case, long hardware is used, piercing through the crossbar and piercing into the mass of the support column. Additionally, the crossbar is fixed using metal clamps and brackets.
After several days, when the concrete has set firmly, you can check the finished horizontal bar for strength.
Upon completion of installation of the structure, it must be painted. In this case, the paint will play not only a decorative role, which is especially important for playgrounds, but also perform a protective function. As you can see, having the knowledge gleaned in our article, making an outdoor horizontal bar or parallel bars with your own hands will not be difficult. And the design of the future horizontal bar will depend solely on your imagination, desire and capabilities.
To keep your back and arm muscles in good physical shape, you don’t have to go to the gym. One of the main sports equipment - a horizontal bar - can be installed at home, even in a small apartment.
Structurally, the horizontal bar can be divided according to 2 criteria:
- At the installation location - indoors or outdoors.
- In terms of functionality, it will only be a horizontal bar, or other projectiles will be combined with it.
Let's take a closer look at these differences.
Types of horizontal bars for indoors and outdoors
If you need to make a horizontal bar for an apartment (room), the following options are available:
- Wall-mounted - attached to a “clean” section of the wall. Structurally, they are made in the form of a supporting part (which is attached to the wall with bolts) and a crossbar located from it.
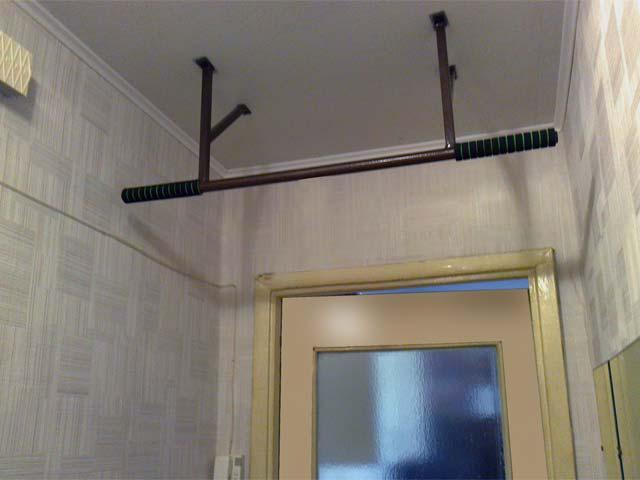
- Wall mounted - above the doorway. Structurally, it is the same as a regular wall horizontal bar, only it is installed above the doorway. It is more convenient for the user because the legs will not rest or cling to the wall when doing pull-ups.
- Angular. Another wall option. The horizontal bar is mounted on two adjacent walls forming an angle. The advantage compared to a simple wall-mounted design is that such a product is more securely held on the wall.
- Sliding, mounted in the doorway. Not everyone will be able to make such a product on their own - it is more difficult to manufacture. Another disadvantage is that a low-quality design may not withstand a lot of weight. The advantage is ease of installation and quick dismantling.
- Curtain walls between two walls located close to each other. They are hung where there is no more than 1-1.5 meters from wall to wall.
- Removable between two walls located close to each other. Variant of the previous paragraph. In this case, the crossbar itself is not attached to the walls. Grooves are cut into them into which the crossbar can be placed. After completing the exercises, the horizontal bar is removed, the grooves remain on the walls.
- Wall bars for wall bars (if there is one in the room).
- Ceiling. Attached to the ceiling.
If you need to build a horizontal bar for the street, the following options are available:
- Crossbar between two trees (if 2 thick trees grow at a distance of 2-2.5 m from each other).
- U-shaped free-standing horizontal bar.
Types by functionality
The simplest version is a regular crossbar attached to a suitable surface. On such a horizontal bar you can simply do pull-ups.
The design can be upgraded in several ways:
- By adding several handles to the crossbar, allowing you to grasp it with different grips. A different grip will allow you to distribute the load on the muscles differently.
- By adding bars.
Pros and cons of homemade structures
There is only one advantage: you can make a design yourself that is ideal for the free space in the apartment.
Of the obvious disadvantages:
- A homemade horizontal bar is unlikely to cost less than a purchased one. You will have to spend around 1000 rubles on the material alone - not to mention the costs of welding and cutting metal (if you don’t do it yourself). A simple wall horizontal bar will cost around 1500-2000 if you buy a new one in the store. That is, this method cannot be called economical.
- Expenses by time. Depending on the model, you will have to spend at least 2-3 hours on manufacturing and fastening (not counting calculations and going to the store for materials).
- The difficulty of metal processing at home. If you don’t have a free garage, basement or workshop, you will have to work with metal in your apartment. It is noisy, dirty, and can stain (at least with metal filings) the interior.
To summarize: a homemade horizontal bar is worth making if you like to make something, or want to get something unusual that is not in the store.
List of materials and tools for making horizontal bars
The list of materials will depend on the selected type of horizontal bar. Therefore, here is a general list of what may be required - without specific sizes and quantities:
- 1 round pipe about 100-110 cm long - for the crossbar.
- 1 square pipe with a cross-section of 30-40 mm, about 3-4 meters long - to create a frame. It will need to be cut into several pieces (the length and number of pieces will depend on the design).
- 4-8 anchors.

For processing you will need:
- Welding machine.
- Tool for cutting metal (saw, grinder).
- File (for processing metal after cutting).
- Marker and ruler.
- Drill (to drill holes in the horizontal bar for fasteners).
- Paint and brush (to paint the finished product).
How to choose the crossbar diameter
To choose the diameter to fit your hand size, you need to measure the width of your palm at the base of your fingers and multiply the resulting number (in centimeters) by 3.3. The result should be rounded up, preferably to the numbers 5 or 0.
For example, if the width of your palm is 9 cm, multiplying by 3.3 gives 29.7. This means that the diameter of the crossbar should be 30-35 mm.
Fastening rules: about the length of the anchor and the number of fastening points
This question is relevant if the horizontal bar is planned to be hung on the wall in the apartment. Of course, we are not talking about drywall - you cannot attach a horizontal bar to it.
The main indicator for calculating attachment points: the load-bearing capacity of 1 point, including bending and shear: it must be at least 130 kg/s.
The number of fasteners is calculated using the following formula:
(PH x 2.5) / 130, where:
- The estimated load - for an adult man weighing about 80 kg will be about 200 kg.
- 2.5 - fixed coefficient.
- 130 - minimum load-bearing capacity of 1 point.
The result must be rounded up to the nearest even number.
Let's give an example, if a person weighing 80 kg is working out on the horizontal bar (that is, the estimated load is 200 kg):
(200×2.5) / 130 = 3.85.
Round up to 4 - this is the minimum number of attachment points. For reliability, you can add 2 more points - up to 6.
All the indicators above are the average minimum, relevant for an adult man weighing up to 80-90 kg.
As for the fasteners themselves: only bolts from M8 in size are suitable, and only in steel anchors. Plastic dowels cannot be used (unless the horizontal bar is hung not for an adult man, but for a child weighing up to 35-40 kg).
Depth to which the anchor should be inserted into the wall:
- Not less than 120 mm - for concrete.
- At least 150 mm - for brick.
- At least 180 mm - for timber made of durable wood.
- At least 220 mm - for coniferous trees or glued timber.
The bolt should protrude no more than 20 mm outward.
How to make and install a horizontal bar
Since there are many ways to create each method, we will consider only one at a time, as an example.
One of the simplest options in terms of implementation for a narrow section of the corridor. You will need:
- Round pipe, 20-30 mm in diameter. The length is equal to the width of the doorway (or the distance between the walls), but during installation it may be necessary to shorten it slightly.
- A metal plate 3-5 mm thick, the width of the door panel.
- 2 wooden blocks measuring approximately 10x10x3 cm - for the “nest” in which the crossbar will sit. The bars can be replaced with plywood, a semicircular metal plate (if the horizontal bar is removable) or a piece of pipe (3-5 cm long) of such a diameter that the crossbar can be inserted into it.
The installation process looks like this:
- The installation height of the crossbar is selected.
- The sockets are attached to metal plates. If the sockets are metal, they are welded to the plates. If wooden, a hole (round or semicircular) is cut in the wood for the crossbar, and the piece of wood itself is attached to the wall on top of the plates.
- The plates cut into the door panel at the selected height.
- The crossbar is “fitted” into the sockets and trimmed if necessary. It will definitely need to be trimmed - at least because a few millimeters will be taken away by the plates on both sides.
- The crossbar is installed in the sockets. If the nests are semicircular, it can be easily removed. If the sockets are round, after installation the crossbar can only be removed together with the plates.
2 options for the street
For the street there are 2 simple options:
- Between 2 trees, if they grow at a distance of no more than 2-2.5 meters.
- Construction of a free-standing U-shaped horizontal bar.
In the first case, the crossbar cuts into the tree into 2 plates, as described above. If the distance between the trees is more than 1.7-2 meters, it is advisable to add 2 oblique pipes to the tree to the crossbar (for additional support).

When creating a U-shaped horizontal bar, 2 square pipes measuring about 7x7-10x10 cm are dug into the ground (ideally with a concrete base). The distance between the support pipes is about 150 cm. A crossbar is welded between them.

Separate horizontal bar for wall or ceiling
We will consider the simplest design. You can hang it both on the wall and on the ceiling.
Approximate drawings with dimensions:


To create you will need:
- Round pipe for the crossbar, 100-120 cm long. If desired: you can bend the outermost 15-20 cm at a slight angle to the floor, and also weld 2 more short tubes (12-15 cm long, the distance between the tubes is about 18-25 cm ) perpendicular to the crossbar - for different grips.
- 2 metal plates or corners, 35x5 cm.
- 4 metal square pipes, 43x5 cm. Instead of a square pipe, you can use a rectangular pipe of the same length.
If your weight is more than 90 kg, for reliability, you can weld 2 more plates between 2 plates - so that they form a rectangle. Additional attachment points can be made in long plates.
All elements are fastened together by welding, assembling the structure according to the diagram above.
Mounted - for wall bars
If there is a wall bars in the room, you can make a horizontal bar that will hang on it.
You can take the design from the drawing above as a basis, changing it slightly. The plates are taken longer (about 50-60 cm) and bent. The bent section should completely “encircle” the crossbar of the wall bars, with a margin of at least a few centimeters.
The effect of sports on physical health has been known for a long time.
That is why the number of fitness centers and sports grounds is growing. Unfortunately, not everyone can afford to regularly visit any of these structures.
Some people don’t have time for this, others don’t have enough money. Often even purchasing an ordinary wall bars becomes a problem.
In contact with
Classmates
Sports corner at home
A homemade sports corner made by yourself will save both time and money. A horizontal bar at home or at a summer cottage is a real alternative option.
Among all the famous sports equipment, it is the most famous and accessible. The presence of such a gymnastic horizontal bar will allow you to pump up your abs and strengthen the muscles of your arms and back with simple exercises.
After all, training on such a simulator contributes to the formation of the relief of the upper body. Even a simple hang on the horizontal bar, when all the back muscles are relaxed and the spine is stretched, corrects the posture of children and adults.
To prevent it from seeming too difficult, it is enough to first do a few general strengthening exercises, for example, push-ups.
Two or three hours, or even less, and a sports corner is equipped to a minimum - a simple horizontal bar is installed. The advantages are obvious:
- Firstly, it will require minimal financial investment.
- Secondly, there is no need for special knowledge and skills, especially since on the Internet you will always find drawings and detailed instructions for constructing this sports equipment.
There are many options for making a horizontal bar, differing from each other in material, design and methods of fastening.
All you have to do is choose the most suitable one, purchase all the necessary materials, and, following the instructions, install it. Of course, the layout of the room, the weight of the athlete, and the availability of the necessary tools and materials are very important.
We do it at the dacha

So she gets much less attention than she would like. First of all, a place is selected for a house and various outbuildings, a vegetable garden, a playground, and a recreation area.
So imperceptibly the entire area becomes distributed.
To install a metal crossbar, you don't need a lot of space. It can be fixed anywhere. In addition, it can be used for sports activities and for beating carpets.
If space allows, you can add a basketball hoop, a sports ladder, parallel bars, or just a horizontal bar.
What is needed for a homemade projectile

 At a minimum, you will need a metal pipe up to 120 cm in length to act as a crossbar.
 Gymnastic standards require that its diameter be 28 mm. But you are not going to world championships, so you can afford a pipe with a diameter of 20 to 35 mm. In addition, it should be smooth and not particularly hard, so as not to hurt your palms. The supports can be wooden poles or metal pipes.
If you have a welding machine, it is better to build a metal horizontal bar. Keep in mind that the cross-section of metal supports should be three times larger than the diameter of the crossbar.
Working out on your horizontal bar should be comfortable. So, for example, for a height of 170-180 cm, its height should reach two meters, and at the same time, the supports will go into the ground up to half a meter.
A drawing that reflects all the parameters of the sports equipment and takes into account the digging depth will greatly facilitate the construction process.
Let's consider the design features of sports equipment, depending on the material of manufacture:
- From metal pipes

Working at heights with welding is quite dangerous, especially if you are not a professional welder, and besides, it is not easy. Lastly, install the vertical posts in the previously prepared holes.
Note: The deeper you dig the shell into the ground, the stronger it will stand.
True, then you will need longer pipes and an earth drill, otherwise it will be difficult for you to make holes of the required depth.
If you are digging to a depth of less than a meter, concrete it with cement-sand mortar (1:3). To fix the supports vertically, it is recommended to support them with wooden wedges. And sand, poured 10-15 cm under the horizontal bar and compacted, will protect from dirt after rain.
The finished projectile should be slightly taller than your height with your arms outstretched. You should begin exercises on the horizontal bar only after the cement has completely set.
- From wooden pillars

The crossbar is secured to the posts with staples. Or they drill a hole in the pillars, insert the crossbar into them so that the edges are behind the supports, make holes in it with a drill and tighten it with a screw and bolt.
- Between two trees
It turns out that this is possible. Especially if there are two trees on the site, one very close to the other. All you have to do is find a suitable piece of metal pipe and secure it:
- The easiest way is to drive staples into the trees.
- Another way is to drive metal pins into each tree, place a crossbar on them and secure it with wire.
- Nail the pipe or screw it with self-tapping screws.
Whichever option you choose, it should be the one that makes the most sense to you and that the crossbar is securely attached.
- Near one tree
It will serve as one support. You'll have to do the other one yourself. A wooden pole dug into the ground will do this role perfectly. And the crossbar is just as easy to attach. One bracket is driven into the tree, the other into the post. For reliable fastening, holes are made in the metal pipe, so you can nail it to the tree much more thoroughly.
Crossbar inside the house
When it is not possible to build a horizontal bar in the yard or on a summer cottage, install it in your home.
Then no weather will stop you from playing sports.
Its basis can be an ordinary steel pipe. Horizontal bars are divided into groups depending on the installation location.
Wall-mounted (mounted)

Two pairs of metal pieces will be used to make two corners, and a crossbar should be attached to each. Both corners are then welded to the frame. To attach the crossbar to the corner, first holes are made on the bottom bar, the crossbar is inserted and the contact points are welded.
All that remains is to drill holes in the frame for fastening and the structure can be hung on the wall. A concrete slab and reliable fastenings will allow your machine to withstand quite a lot of weight. And before installation, you can first paint the structure.
Advice: If you wrap the handles of your pull-up bar with electrical tape, the pull-up process will be much easier. By the way, such a horizontal bar can even be built on a balcony.
Before you start making this complex wall horizontal bar, make the right drawings. It will be much more convenient for you to work.
As an example, here is a drawing of beams that you can make with your own hands:
Advantages of a wall horizontal bar:
- It is compact and will fit even in a small room;
- Mobile and with the same effect will be located at any height that the ceiling in the house allows;
- The powerful fastening system makes it very reliable.
Disadvantages of a wall horizontal bar:
- You won't be able to perform flips and other tricks on it because the bar is located too close to the wall;
- Body weight can be a limitation.
In the doorway
The pipe is selected according to the dimensions of the selected passage. This horizontal bar is most suitable for a child or teenager.For an adult, height will be a problem. It is difficult to concentrate on classes when you have to constantly tuck your legs in order to perform the simplest exercise.
The easiest way is to use a steel pipe and a couple of wooden blocks, and then follow the scheme:
- At the ends of the pipe, two cuts are made in a cross up to seven cm deep, and a pair of opposite petals are cut off from each end;
- in each of the bars you need to drill holes with a diameter like a pipe;
- the bars are put on the pipe;
- bend the petals so that they adhere to the wooden surface as tightly as possible;
- mark the installation location in the opening;
- prepare holes on the wall, bars and pipe petals;
- the pipe is fixed in the opening along prepared holes.

Advantages of a horizontal bar in a doorway:
- easy to install;
- compact and can also be mounted between walls in the corridor;
- safe;
- will withstand 100 kilograms without problems;
- can be equipped with additional equipment, such as a swing, gymnastic rings or a punching bag.
Disadvantages of a horizontal bar in a doorway:
- installation height is limited by the opening;
- restrictions on movement created by walls.
Ceiling

You can choose an option with different grips or an adjustable one. As usual, you will need a thick-walled metal pipe or a stronger handle, three meters of rope, at least 8 mm in diameter, two anchor bolts and carabiners.
First, decide how many supports the horizontal bar will have, one or two (the latter option is certainly more reliable).
If you choose a pipe, decide how the rope will be attached to it, whether you will need through holes or whether you will use welded loops. It is enough to make small indentations in the wooden handle and the rope will not slip off, but it can also be nailed down.
When the preparatory part is completed, drill holes for the anchors, secure them, attach the carabiners and pass the rope through them.

The disadvantages of ceiling horizontal bars are that their installation is more complicated. And God forbid, you drill a hole for your neighbors when you start attaching it to the ceiling. In addition, it will leave behind not very aesthetic marks that are not easy to remove.
Of course, you can even make a floor horizontal bar, also called 3 in 1, which will require reliable fastening to the floor. But in an apartment it is unlikely that it will be possible to provide such fasteners, because the norm for the load-bearing capacity of the floor in a residential area is 250 kgf/sq.m. m with the required 400.
You will find many options for making this most common sports equipment, even with video instructions. You are quite capable of building a homemade horizontal bar, from the simplest, spacer, folding or children's bar, to a complex multifunctional design.
A country house or dacha is not only a place for garden beds and berry bushes. It is pleasant and useful to exercise in the clean air, keeping fit and healthy. The best way to do this is your own horizontal bar or other simple sports equipment that adults and children can train on.
How to choose a horizontal bar
There are many options for making outdoor exercise machines. To decide on the design, you need to understand exactly what you want to get from the sports equipment. For people who are constantly involved in physical exercise, this question does not arise - the accumulated experience of regular exercise helps.
What do regular workouts on the horizontal bar give?
For those who engage in physical education occasionally and do not systematize their skills, we can remind you of important points:
- The horizontal bar is the simplest sports equipment that can be easily made by hand. If there is no desire or time to do this, buy the finished product in a specialized store, either individually or in a set with other gymnastic equipment.
- All people, regardless of age, from the elderly to the youngest representatives, can enjoy exercising on the horizontal bar.
- Exercises on this apparatus allow the athlete to constantly keep himself in good shape, fit and strong.
- Passive exercises on the horizontal bar help to stretch and relax the spine, relieving tension after working in an uncomfortable position in the garden.
- It is extremely useful for schoolchildren and students to perform relaxation exercises after sitting at a desk for a long time. They help correct your posture and get an additional boost of energy as a result of increased blood circulation.
- Regular training increases endurance and resistance to increased psychological stress that accompanies us everywhere.
- The variety of designs of horizontal bars and their reasonable combination with other sports equipment are very attractive to young children, which gradually draws them into physical education.
- Exercising in the fresh and clean country air helps strengthen the body and cleanse it of harmful products that fill the air of cities.
Outdoor exercise is beneficial and enjoyable
Types of horizontal bars
The choice of design for this simple projectile depends on many factors, including the size of the area. There was a time when its typical area was 4 acres. It is clear that in such territories the construction of a sports town or a simple horizontal bar is not a priority task.
- Horizontal bar with crossbar on two posts.
A simple horizontal bar with a crossbar takes up little space, but training opportunities on such a device are still limited
- Gymnastics complex - training methods can be significantly expanded if, along with a horizontal bar, you install parallel bars, a Swedish wall and hang a rope.
With such equipment you can expand the range of exercises for all muscle groups, make training interesting and meaningful
- Children's gymnastics complex - a child will be happy to spend time on such simulators, especially if the composition is supplemented with a pendulum swing.
To attract the younger generation to physical education, the gymnastics complex must be designed accordingly and its content must be carefully thought out in order to interest the child in training.
Such a device does not take up much space on the site, but allows you to perform a number of warm-up and strength exercises.
Choosing a location for exercise equipment
Before working on the design and composition of the simulators, you need to decide on the location of the gymnastics camp. In this case, it is necessary to take into account the opinion of specialists with experience in such work:
- the most appropriate place to place exercise equipment would be the backyard, isolated from the excessive curiosity of passers-by and neighbors;
- the underlying surface of the exercise area must be sufficiently elastic to avoid injury from falls. The best material is crumb rubber. To use it, you need to remove the soil layer of the earth, arrange a drainage layer up to 15 cm thick of sand and gravel, and cover the shock-absorbing bedding with a layer of 15 cm. You can use sawdust and shavings instead of crumbs;
- You should avoid placing exercise equipment in the sun, as the heat will not allow you to exercise or simply spend time with children during the day. You should choose a well-shaded or semi-shaded side of the site. At the same time, tree branches or bushes should not interfere with classes.
The optimal place to place your own training complex would be the backyard
Main design characteristics
First of all, you need to decide on the material that will be used in the manufacture of simulators. To do this, it is worth conducting an audit of the remaining building materials from the construction of a country house.
Materials
- Metal. The most convenient are the remains of the casing pipe from the construction of a well on the site. Mostly for private wells, pipes measuring 89–146 mm are used; any product from this range will serve for a long time and reliably. An additional argument in favor of using pipes is the presence of a welding machine in the yard and the ability to use it. For the same purposes, you can safely use square pipes left over from the construction of a fence on the site. The dimensions used in the range from 80x80 mm to 150x150 mm with a wall of 4–5 mm are ideal for constructing a horizontal bar. High weldability is ensured by the use of steel with a low carbon content for the production of such products.
- Wood. There are always enough leftovers of various wooden profiles at the end of construction. Of course, preference should be given to coniferous wood or hardwood, such as oak, hornbeam, ash and the like. Profiles can be round, square or rectangular. A practical solution can be considered the use of glued structures, since they acquire the properties of anisotropy of mechanical properties.
- Fiberglass. For load-bearing structures, you can successfully use profiled fiberglass products, for example, round or square pipes. The advantage is that it is absolutely inert to corrosion; no costs are required for protection against it, but painting for design purposes can be considered mandatory.
Photo gallery: horizontal bars made of various materials
 Tree trunks were used as supports for the unusual design.
  Metal is the most common material for sports equipment
  When constructing a horizontal bar, you can combine metal and plastic
  Wood is an environmentally friendly material, well suited for children's exercise equipment.
Dimensions
Dimensions of the main parts for outdoor sports equipment:
- for load-bearing metal structures, pipes with diameters from 89 to 146 mm can be used;
- gripping structural elements for adults - 32–40 mm, seamless and electric-welded pipes can be used, provided they are rigidly attached to the supporting structures (welding);
- It is better to make the crossbars of the horizontal bars from a rod with a diameter of up to 40 mm from steel 45. Welding in this case is strictly prohibited.
The depth of penetration of load-bearing elements into the ground must be at least 80 cm; concreting is required. Thus, the length of the horizontal bar posts must be at least three meters.
Step-by-step instructions for making a horizontal bar
To make a horizontal bar outdoors, you need to perform a series of sequential steps.
Preparation
- Develop a preliminary design of the horizontal bar design.
- Make sketches of parts with dimensions.
- Draw up a specification of the required materials for the manufacture of a horizontal bar, including main products, fasteners, electrodes, materials for protective coatings, fixtures and tools. By adding prices for all listed material assets to this list, you can get a cost estimate.
This stage must be approached carefully in order to avoid additional expenses and not wander around stores and markets in search of what was previously missed.
Procurement operation
This stage begins after an audit of available materials and the purchase of missing materials. Procurement operations include:
- Purchase and delivery of materials and tools.
- Cutting linear materials into parts in accordance with sketches. Manufacturing of parts. At this stage, you will need a grinder, a measuring tool, and more, depending on the design.
- Preparing the workplace for assembly. Installation of the slipway. Electrical cable supply for the operation of the tool and welding machine, grounding device.
When cutting materials, it is vitally important to strictly follow the rules for safe work. Do not work without a protective cover on the grinder; protect your face with a shield. The consequences of violating these rules can be dire.
After finishing cutting metal workpieces, it is necessary to carefully process the cutting areas, removing sharp edges and burrs.
This can be done with the same grinder or hammer.
Assembly
Before starting this operation, the parts must be laid out on the slipway, first the supporting ones, then the auxiliary ones. In the case of a horizontal bar, you will need two posts and a crossbar. During preparation, you need to choose a method for installing the crossbar and prepare a seat for it in advance.
The crossbar can be secured in different ways
The upper ends of the pipes must be plugged by welding sheet metal covers to them. Clean weld seams with a grinder or files. Dull sharp edges.
- Before installation, the assembled structure must be protected from exposure to the atmosphere. For this:
- The lower part, immersed in the ground, should be protected from corrosion using bitumen mastic. It can be water-soluble or solvent-based. Both are quite reliable, but the second dries faster. The mastic is applied to the prepared surface (after removing rust) at a distance of about a meter from the lower end. This means that a small part of the treated surface will protrude from the ground.
The rest of the structure must be prepared for painting by applying a metal primer.
Installation
- To perform this operation, you need to make two holes in the ground. Their depth is 120 cm, so it is better to use a garden auger with a diameter of 20–25 cm to dig them.
- Create a drainage layer at the bottom of the recesses. To do this, you need to pour sand about 18–20 cm thick into them. To settle the sand layer, it needs to be thoroughly compacted and spilled with water. On top of it you need to pour a layer of medium-fraction gravel 10-12 cm thick and also compact it thoroughly.
Lower the structure with its lower ends into the pits and carefully align it with a level and plumb line. Secure with temporary jibs.
- Prepare a concrete mixture of grade 300, which involves the use of grade 400 cement and clean river sand in a ratio of 1:4. Water is added until the desired consistency is obtained.
- Fill the pits with the installed projectile with concrete. The installation of formwork in this case is not necessary. During the pouring process, compact the concrete mass, avoiding the formation of air bubbles. After pouring is completed, cover the surface with film. The drying period for concrete is at least 7 days; the end of crystallization of the mass will occur no earlier than after 28 days. In hot weather, you need to remove the film daily and wet the concrete surface.
The pits for the horizontal bar supports are filled with concrete
- If the user of the simulator plans to use it to perform amplitude swing exercises, you need to install stretch marks - two for each post. The angle of inclination of the guy wires relative to the ground surface should be approximately 30 degrees, the deviation to the side from the supports is about 15 degrees. To attach the guy wires at ground level, holes are made in it with a depth of 50–60 cm in diameter using an existing garden drill. A metal anchor is installed in the concrete to secure the guy wires.
Children will be interested in bright colors and unusual designs
You need to pay attention to the quality of the ladder rungs. To ensure that the metal surface of the crossbars does not slip and maintains a normal comfortable temperature, it must be rubberized. Neoprene is also used as a protective coating. For safety, wooden crossbars are carefully processed and coated with a colorless, odorless varnish.
Video: building an outdoor horizontal bar and parallel bars with your own hands
An outdoor horizontal bar, supplemented with other gymnastic equipment, will help you stay fit, and involving children in training will teach them to an active lifestyle. And most importantly, such a simulator can be built independently, without using expensive materials.