This article provides instructions on how to create a multi-boot flash drive using the MultiBoot USB program. The program works with NTFS and FAT32, so you can use not only a flash drive, but also an external hard drive.
Preparing for installation
1. First, let's take a flash drive of a size so that all the planned images fit on it.
The image created by this program has the following programs preinstalled:
- FreeDOS - Boot in command line mode, includes DOS-Navigator and VC
- Universal Boot Disk v3.7 - Working with NTFS partitions in MS-DOS
- NT Password & Registry Editor - Change password and edit Windows XP registry
- Active@ Boot Disk Professional v2.1 - Recover deleted files
- QuickTech Pro v5.8 - Testing and diagnostics of hardware and its components
- MemTest86 v4.20 - Testing and diagnostics of RAM
- MHDD v4.6 - Testing and diagnostics of hard drives
- Victoria v3.52 - Testing and service maintenance of IDE and Serial ATA HDD
- HDD Regenerator v2011 - Eliminating physical damage to the HDD
- Symantec Ghost v11.0 - Working with hard drive partitions.
In addition to the utilities listed above, you can add ISO images to the package (the necessary menu items have already been created for them, and dummy files that need to be replaced with real images):
- Windows XPE - Mini version
- Windows 7PE - Mini version
- Acronis Disk Director & True Image - Working with hard drive partitions.
The process of installing and creating a multiboot flash drive
1. First, launch the utility HP USB Disk Storage Format Tool, select the device, check the box " QuickFormat" and format it (preferably under NTFS, so that if something happens there are no problems with large image files).
2. Next we install grub4dos. Launch Grub4Dos Installer, in the "DeviceName" field select Disk, and your device (the device name is not displayed, only the size in megabytes). Click " Install".
Technically, the flash drive has already become multiboot, but apart from the utilities that we unpacked, there is nothing on it.
Let's supplement the set with images of operating systems. For convenience, you can create an “iso” folder in the root, where all disk images will be located.
For Windows family systems
To install Windows 7, Windows 8, Windows 8.1, follow paragraph 4.1 of the instructions, selecting the appropriate (2nd) checkbox:
For Linux-based images
Open the file on the flash drive menu.lst(at the root) with notepad and replace the default items with the desired ones, for example:
find --set-root /iso/ubuntu1110i386.iso // where “/iso/ubuntu1110i386.iso” is the path to the image
map /iso/ubuntu1110i386.iso (0xff) || map --mem /iso/ubuntu1110i386.iso (0xff)
chainloader (0xff)
Checking the functionality of the flash drive
To check the operation, run WinSetupFromUSB, select the created flash drive in the device field, and check the “TestinQEMU” box. Clicking on “GO” will start loading from the flash drive in a virtual environment without rebooting the system.
How to change the background image under the boot menu
1. You will need a background image layout in PSD and an archive for repacking the skins. Edit the PSD file and save it as a BMP (you may have to resave it with a third-party program).
2. Copy the finished file to the “Files” folder from the “SkinsRepack” archive, and run the “Pack.cmd” file. We get the Skins file without extension. We copy this file to the flash drive, and in the files menu.lst and /boot/menu_u.lst in the second line we indicate the path to the skin:
gfxmenu /boot/Skins
You can also check what your new skin looks like in the emulator.
After all the steps, there will be two folders and four files on the flash drive, however, they can be marked as hidden, which will not affect the operation of the device in any way.
Testing in the emulator does not provide a 100% guarantee that a particular image will work in real conditions. Checks on VirtualBox or VMWare virtual machines also may not always work correctly, so it is best to check on real hardware.
For example, you can download a ready-made menu.lst file with the following specified in the download:
- Microsoft Windows XP SP2 x86
- Microsoft Windows 7
- Windows 8
- Ubuntu 14.04
- Debian Live 7.5.0
- Linux Mint 17
- Fedora 20
- Acronis Disk Director & True Image
- Hirens BootCD 15.1
- Kaspersky Rescue LiveCD
If you want to create a bootable USB flash drive or burn a distribution kit of some utility/program onto it, you need the appropriate software. This article will present several of the most convenient and easy-to-use programs and utilities. All that remains is to choose the most suitable one for yourself.
The first solution is the official program from Microsoft, called Media Creation Tool. Its functionality is small, and all it can do is update the current version of Windows to the latest 10 and/or write its image to a flash drive.

The advantage is that it will save you from searching for a clean and working image, thanks to the fact that it will record the official distribution kit on a USB drive.
Rufus
This is a more serious program that has all the necessary functions to create a full-fledged bootable USB drive. Firstly, Rufus suggests formatting before burning the distribution. Secondly, it carefully scans the flash drive for damaged sectors so that you can replace the media if necessary. Thirdly, it offers two types of formatting: quick and full. Of course, the second will delete information more efficiently.

Rufus supports all types of file systems and is portable. By the way, thanks to the Windows To Go feature, you can burn Windows 8, 8.1, 10 to a flash drive and run this system on any PC.
WinSetupFromUSB
The next solution is Win Setup From USB. Unlike the previous program, this utility is capable of recording several images at once, creating multiboot media.

Before you start using it, it suggests making a backup copy of all information on the media, as well as setting up the boot menu. However, the utility is not Russified, and the menu through which control takes place is quite complex.
SARDU
This program will save you from having to search for the necessary distributions on the Internet, since you can select the ones you need directly in its interface. She will download everything she needs from official websites and record it on the required media. The created image can be easily tested for functionality through the built-in QEMU emulator, which was also not the case in previous software solutions.

There were some downsides too. The fact is that most images can be downloaded via the SARDU interface for subsequent recording on media only after purchasing the PRO version, otherwise the choice is limited.
XBoot
This program is easy to use. All that is required to get started is using the mouse to drag the required distribution kits into the main program window. There you can distribute them into categories and create a description for convenience. In the main window you can see the total size of all distributions loaded into the program in order to select the media of the required size.

As in the previous solution, you can download some images from the Internet directly through the XBut interface. The choice, of course, is small, but everything is free, unlike SARDU. The only negative of the program is the lack of Russian language.
Butler
This is a utility created by a Russian developer, which is not very different from previous solutions. With it, you can record multiple images and create unique names for them so as not to get confused.

The only thing that distinguishes it from other similar programs is the ability to choose the design of the menu of your future bootable media, but you can also select a regular text mode. One bad thing is that Butler does not provide the ability to format a flash drive before recording.
UltraISO is a multifunctional program for burning images not only to a flash drive, but also to CDs. Unlike some previous programs and utilities, this one can create an image from an existing disk with a Windows distribution for subsequent recording on another medium.
Another good feature is creating an image from an operating system already installed on the hard drive. If you need to run a distribution, but don't have time to burn it, there is a mount function that allows you to do this. In addition to all this, you can compress and convert images to other formats. The program has only one drawback: it is paid, but there is a trial version for testing.
UNetBootin
This is a simple and portable utility for burning images to a flash drive. As in some previous programs and utilities, the functionality of YunetButin is limited to recording an existing image on media and the ability to download what you need from the Internet through its interface.

The main disadvantage of this solution is the inability to simultaneously record several images on one drive.
PeToUSB
Another free, portable utility for creating bootable media. Among its capabilities, it is worth noting the formatting of a USB drive before recording, which is clearly lacking in the same UNetBooting. However, the manufacturer has long stopped supporting its brainchild.

It supports writing OS images to a flash drive with a capacity of no more than 4 GB, which will not be sufficient for all versions. In addition, the utility is not yet Russified.
WinToFlash
The selection is completed by a functional program for recording images – WinToFlash. Using it, you can burn several distributions at once and create multi-boot media, unlike Rufus. As with UltraISO, through this program you can create and burn an image of an existing disk with a Windows distribution. It is also worth noting the function of preparing the media for recording - formatting and checking for bad sectors.

Among the features there is also the function of creating a bootable USB flash drive with MS-DOS. VinTuFlash provides a separate item that allows you to create a LiveCD, which may be necessary, for example, to restore Windows. There are also paid versions of this program, but the functionality of the free version is quite enough to easily create a bootable flash drive or disk. In fact, WinToFlash combines all the useful features of the previous software solutions we discussed above.
All the programs and utilities listed in this article allow you to create a bootable USB flash drive, and some even a CD. Some of them are modest in terms of functionality, while others offer a range of features. You just need to choose the most suitable solution and download it.
Program name: kit for creating a multiboot flash drive
Program version: 2.0 (04.2016)
Release Date: April 2016
Author of the assembly: OVGorskiy®
Interface language: Russian (Russia)
To create a multiboot flash drive you will need:
- this package for creating a multiboot flash drive;
- a flash drive with a size of at least 4 GB (the required size depends on your needs);
- iso images of the Windows operating system vista/7/8/8.1/10... (how many and which ones depend on your needs);
- a computer with a recommended RAM size of 1 GB or more;
- display device with a resolution of 800x600 or more.
This collection for creating a multiboot flash drive is designed for “yourself” with the goal of creating a flash drive with which you can check and, if you need to correct errors in the operating system and computer equipment, install from it different OS editions and bit depths, and all this, having the ability to easily and just place OS images on a flash drive and, if you need to replace and update them, delete and add them. The collection is intended for loading from BIOS. On computers with UEFI, it is suggested to disable this mode or boot in BIOS compatibility mode.
This package contains
- a set of utilities for preparing a bootable flash drive;
- a set of files for copying to a flash drive;
- a set of additional programs and utilities.
Note: you can place as many OS images on a flash drive as its capacity allows. You can download operating system images yourself from this resource or from any other available resources.
List of programs and utilities that will be integrated onto the flash drive
- Active Boot Disk Suite 9.1.0 Ru - a huge package of utilities for working with the OS and computer;
- AntiWinBlock 3.1 FINAL Win8.1PE Upd 03.2016 - a software package designed to treat an infected Windows system from all kinds of viruses. It will help in system recovery for both beginners and advanced users. The disk contains the best anti-virus programs: AntiSMS, AntlWInLocker, uVS, Dr.Web, ResetWindowsPassword, TotalCommander....
- Paragon Hard Disk Manager 15 Pro 10.1.25.813 ru - a well-known set of utilities for working with hard drives;
- Acronis Media 2016 (Acronis True Image 2016 and Disk Director 12.3270) - a new set of utilities for working with hard drives;
- Win7 Live CD x86-x64 by Xemom1 - mini OS launched from a Win7-based flash drive;
- Kaspersky Rescue Disk 10 Upd 03.2016 - Kaspersky anti-virus to scan the OS for viruses;
- AntiSMS 8.3 PE4 - unlocking the OS after infection with Trojans, blockers, etc.;
- AntiWinLocker LiveCD 4.1.5 WinPE4 - unlocking the OS after infection with Trojans, blockers, etc.;
- Reset Windows Password 5.1.5.567 - reset user passwords for those who forget;
- Active Password Changer 6.0 DOS program will help you quickly and easily reset your Windows password!
- HWINFO-AIDA - obtaining complete information about the PC (DOS);
- Victoria 3.52 - the best utility for working with a hard drive (DOS);
- Memtest86+ 5.01 - the best utility for testing RAM (DOS);
- GoldMemory 7.85 - utility for checking RAM (DOS);
- MHDD 4.6 - HDD testing and recovery (DOS);
- Volkov Commander (NTFS+) - file manager for DOS;
- FixNTLDR - Windows bootloader recovery (NTLDR is missing Press...);
- Kon-Boot 2.1 Commercial - a utility for bypassing a password when logging in (for specialists!);
Note: if you are not satisfied with the set of programs and OS, as well as the design of the menu, you can painlessly replace everything with your own, of course, having a little skill in this.
Description of the process of creating a bootable USB flash drive
Introduction. I think we all have several favorite CD/DVDs with operating systems, programs, utilities for restoring and checking the OS and hardware, etc., which we constantly carry with us - just in case. But CD/DVD is a bulky and unreliable medium. If you're tired of carrying around a bunch of CDs/DVDs, I suggest recording it all on a flash drive. And why not make them a bootable USB flash drive with distribution kits of the necessary OS? This can be very useful when installing/reinstalling operating systems on netbooks that do not have optical drives. It can also speed up the installation process and make it much quieter and easier on a computer that has a drive. A little theory. Initially, the majority of flash drives do not have the ability to boot from it, and the computer BIOS does not even have such a function. You won’t find it in the BootMenu, there are a lot there, usb-floppy, and usb-cd, and usb-hdd, but there is no pure flash drive. We need to trick the computer and present our flash drive as a supported device. Usually they take the boot area of a USB HDD as a basis, i.e. We imagine a flash drive as a bootable hard drive. How to do this? Let's use specialized utilities for this. So, let's use a simple and intuitive method that works on most flash drives.....
Warning: all data on the flash drive will be deleted, take care to save the necessary data from it on another medium!
Instructions. Part 1.
- Unpack the archive of this assembly onto your hard drive.
- Insert the flash drive.
- Open the “Tools” folder.
- Run HP USB Disk.EXE to format the flash drive (see Fig. 1).
- Using the BOOTICE program, install the bootloader (see Fig. 2, 3, 4).
After this procedure, a bootable USB flash drive will be created; now we need to place the files we need on it. Open the “Files_for_flash” folder, select all the files and copy them to the root of the flash drive. To check that everything was done correctly, you need to run the "Moba LiveUSB 0.2" program from the flash drive. This is a miniature virtual machine emulator designed specifically for testing bootable flash drives. After startup, a boot menu should appear with operating commands for launching programs. True, not all programs run under the emulator, but you can evaluate the performance of the menu. You can and should also check the flash drive during actual booting from it by rebooting the computer. Now the flash drive is ready for use as a recovery and test drive.
Differences from previous versions
- support for integration onto a WinXP OS flash drive has been discontinued;
- almost all programs and utilities for the flash drive have been updated;
- the method of integrating the OS onto a flash drive has been changed;
- The boot menu interface has been completely changed;
- now you can integrate as many OS images onto a flash drive as will fit on it, without combining them into one image in advance.
Additional material on flash drive
FiraDisk_integrator - a utility for integrating FiraDisk into OS images;
GFX-Boot Customizer - a program for creating your own boot menus;
Moba_LiveUSB_0.2, MobaLiveCD_v2.1 - virtual machine emulators for testing the boot menu;
WContig is a program for defragmenting files on a flash drive.
Brief description of programs
Multifunctional multiboot flash drive.
Editorial team OVGorskiy.
Active Boot Disk Suite 9.1.0 En
Active Boot Disk Suite is a real operating system on a CD/DVD/USB drive. To load this rescue disk, which contains many tools for working with disks, you just need to burn the image to a disk or USB flash drive and restart your computer. The Active@ Boot Disk distribution includes tools for data recovery, resetting Windows passwords, creating system backups, securely deleting information, etc. Active@ Boot Disk Suite allows you to create images in Windows (based on Windows 7) and DOS shells, you can also use the Boot Disk Builder to add additional files to the image. After which the program will write the created image directly to a disk, USB flash drive, or create an ISO file of a boot disk image.
AntiWinBlock 3.1 FINAL Win8.1PE Upd 03.2016 - a software package designed to treat an infected Windows system from all kinds of viruses. It will help in system recovery for both beginners and advanced users. The disk contains the best anti-virus programs: AntiSMS, AntlWInLocker, uVS, Dr.Web, ResetWindowsPassword, TotalCommander....
Paragon Hard Disk Manager 15 Pro 10.1.25.813 ru - Everything you need for professional hard drive maintenance! Unique protection and recovery tools for physical and virtual machines. The best partitioning technologies on the market for hard drives, solid-state SSDs and USB drives. Supports all types of migration scenarios for physical and virtual environments. Agentless protection for MS Hyper-V guest machines. Full support for Windows 10!
Why not have the best? Hard Disk Manager 15 Professional contains everything you need to manage your data and storage devices like a pro. Never before have home users had such powerful tools at their disposal: comprehensive data exclusion filters to optimize backup and recovery operations, the fastest and most secure storage device partitioning technologies on the market, and agentless protection for Hyper-V guest machines.
Acronis Media 2016 (Acronis True Image 2016 and Disk Director 12.3270)
Acronis Rescue Media Full - A universal boot disk containing a software package for full backup, allowing you to create accurate images of the hard drive and its individual partitions, manage partitions - create, move, merge, divide. There are two versions of the disc in the distribution: Russian and British. The disks are complete collections of the most popular Acronis utilities. The "native" boot menu is used.
Win7 Live CD x86&x64 by Xemom1
Win7Live by Xemom1 is a special edition of Win7Live, with a classic interface and support for network and SCSI/SATA devices. There is no multimedia support. The kernel has built-in ERD-Commander 6.5 for restoring crashed Windows 7, and there is also a standard W7 recovery function. It is possible to install 7 in the classic way (from a CD or from the SOURCES folder on any disk), i.e., W7PE can completely replace the PE installer for 7. You can also install any version of Windows from 2000 to 2008 from any media/folder using the WinNtsetup2 program.
Kaspersky Rescue Disk 10 with updated databases for March 2016.
Kaspersky Rescue Disk 10 is a special program designed to scan and disinfect infected x86 and x64-compatible computers. The program is used when the level of infection is such that it is not possible to cure the computer using anti-virus programs or treatment utilities (for example, Kaspersky Virus Removal Tool) running under the operating system. At the same time, the effectiveness of treatment is increased due to the fact that malware located in the system does not receive control while the operating system is loading. In emergency recovery mode, only the tasks of scanning objects and updating databases are available, as well as rolling back updates and viewing statistics.
AntiSMS 8.3 PE4
The AntiSMS boot disk is designed to automatically treat ransomware, blockers and Trojan.Winlock, which block the Windows OS, requiring the user to send an SMS to unlock the system. Allows even inexperienced users to unlock Windows if the system is infected with blockers (ransomware, advertising and porn banners) or Trojan.Winlock trojans. When you start your computer from a boot disk, AntiSMS automatically performs all the necessary actions to disinfect the infected system. The Windows Registry Editor is available in manual mode.
AntiWinLocker LiveCD 4.1.5 WinPE4
AntiWinLocker LiveCD are designed to unlock and treat an already infected (locked) Windows OS, in case of infection with Winlocker (Trojan.Winlock ransomware Trojan), which is a banner that blocks the operation of the system: launching the task manager, registry editor, as well as loading Windows in safe mode and after that the attackers extort money, for example, demanding that an SMS message be sent to a paid number to unlock the Windows OS.
Reset Windows Password 5.1.5.567
Reset Windows Password is the best professional program to reset, change or recover passwords for all types of Windows accounts. The utility supports all versions of Windows, works with local and domain accounts, almost instantly recovers passwords for accounts, in addition, there is a Russian interface and Russian-language technical support. support. Reset Windows Password is necessary if you lose your Administrator password; if you forget your Windows login password, you cannot activate your account. The program is loaded from a bootable CD or USB drive. The application interface is designed in the form of a wizard. Therefore, the operation process does not seem complicated even to an inexperienced user. Unlike other similar utilities, Reset Windows Password is the ONLY program that works CORRECTLY with all types of Windows accounts.
Active Password Changer 6.0 DOS program will help you quickly and easily reset your Windows password!
ASTRA 5.52
ASTRA - Advanced Sysinfo Tool 5.52 A program for analyzing computer configuration. It is very undemanding of resources and works even on very old computers, including those that cannot even dream of using Windows
Victoria 3.52
Victoria is a program for testing, diagnosing and minor repairs of hard drives with IDE or SATA interfaces. The program is free and is intended mainly for employees of specialized service centers. At the same time, Victoria is very popular among a wide range of computer users, since it allows you to: identify faulty areas of the hard drive surface at home; determine the average access time; control the noise level; delete information from the hard drive without the possibility of recovery; set User and Master passwords.
Memtest86+ 5.01
Key update to Memtest86+, a reliable RAM test. The first beta version added support for all modern platforms and introduced a number of major internal changes, including support for multi-threading, increased speed of fault detection, and display of processor temperature.
GoldMemory 7.85
The program is a comprehensive test for checking RAM for errors. Supports virtually any type of module, as well as any PC-compatible platform in various configurations. Allows you to scan all available modules and determine the presence of errors, which, as a rule, affect the instability of the system as a whole. The utility is designed to work in DOS-compatible operating systems; it has a number of command parameters for batch work and functions for creating reports based on testing results.
MHDD 4.6
MHDD is a software package for accurate diagnostics and minor repairs of drives (HDD). Allows you to work with drives at a low level, directly through the IDE controller ports. Performs very fast and accurate diagnostics of the entire surface of the drive (unlike programs such as NDD, ScanDisk, which address only logical partitions), regardless of the data located on the drive being diagnosed. Allows you to get rid of the so-called “soft”-bad sectors as quickly as possible.
Volkov Commander (NTFS+)
The famous shell for DOS. VC allows you to mark, copy, move and delete directories with all subdirectories in the same way as regular files. When copying, you can split and merge files. The functionality is extremely rich.
FixNTLDR
The Fix NTLDR is missing utility restores the Windows bootloader, correcting the situation when, when the computer boots, the message "NTLDR is missing Press CTRL+ALT+DEL to restart...
Kon-Boot 2.1 Commercial
Kon-Boot is an application program that modifies the contents of the Windows kernel on the fly/during boot, bypassing the Windows authorization system and allowing you to log into a password-protected account without entering a password. Your favorite password is not overwritten, and when Windows is rebooted, the original contents of its kernel and authorization procedure are restored.
A flash drive from which you can boot is a very convenient tool for carrying out restoration work or installing an OS on modern computers. It is compact, it does not need a disk drive, and the reading speed via the USB 3.0 interface is noticeably higher. To prepare such media, programs are used to create a bootable flash drive.
First you need to download the ISO image of the required bit depth and edition. The drive must be at least 4 gigabytes in order for the installation image of the “seven” to fit onto it. Windows 10 will require an 8GB drive.
It is better to use a blank USB drive, since during the recording process, all data, regardless of the number of partitions on it, may be deleted.
What to use for recording
There are various utilities that can transfer the OS installer to a USB drive. Also, such a program can be used to create your own bootable flash drive with arbitrary software - system recovery utilities, anti-virus Live-CD or disk management tool. Let's consider some of them, and also analyze the sequence of necessary actions:
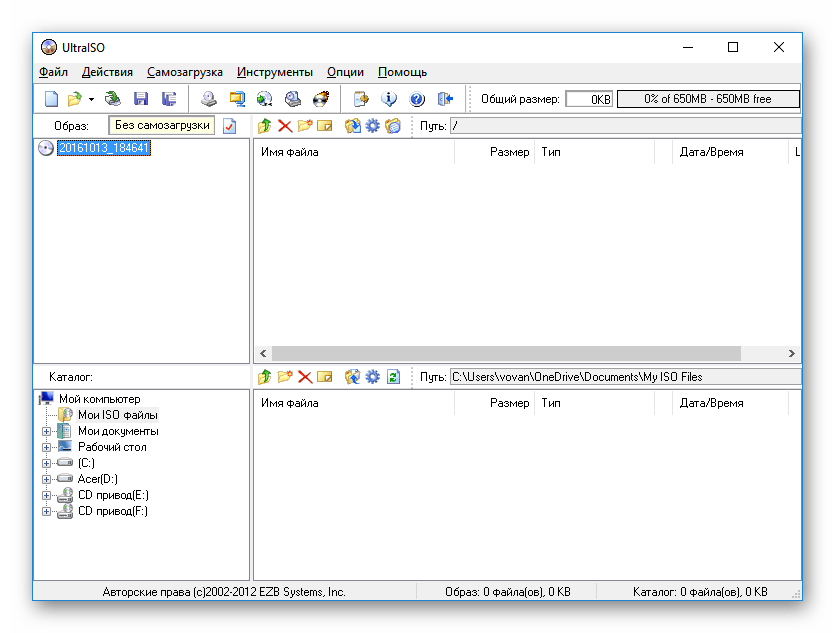
Ultra ISO
A very convenient application, since it allows you to burn various ISOs completely automatically, check the prepared media for correct data copying, make a USB drive bootable, and so on. There is a paid version and a fully functional free version.
Let's look at the operating principle:
- First you will need to specify the ISO for recording: select " Open" on the menu " File"or click the open icon, then select the desired image.
 Its contents will appear in the top panel.
  The flash drive is selected below, in the section “ Catalog" It should be connected in advance.
 - After this, you need to go to the point “ Burn a Hard Disk Image..." In chapter "".

- You don’t have to change the settings, except perhaps add a checkbox “ Examination».
 After clicking Write, a warning will appear that all data on the drive will be erased.
- The program will record the image and automatically check it.

Do not remove the USB drive or use it at this time.
There is no notification about the completion of recording, only the corresponding line appears in the log. All you have to do is click Back and exit the application.
Rufus
A small utility for preparing media: in a single window, select a bootable USB flash drive and the program writes an image to it. Let's take a closer look at the work:

When finished, you can go to “ Magazine» and view the operation log or immediately close Rufus. 
Another recording program that makes it easier to create a bootable USB flash drive for Windows 7. Let's look at how it works:
- You will need to select the drive, check FBinst and switch the format to NTFS (this is faster).

- Then check the box with OS and select files to copy. Windows 7 needs ISO (standard selection window).
 And for XP you need to specify the path to the folder with the installation files, that is, first unpack the ISO using WinRAR, for example. This folder should have a subfolder I386 or AMD64.
- You can note " Test in QEMU", then the flash drive will be tested for bootability.
- The utility will remind you about NTFS.

- And it will show the license with which you must agree I accept.

- Recording is started with the Go button. WinSetupFromUSB will warn you about the destruction of information on the selected disk.
 And he will warn you again.
- USB preparation will then begin.
After recording, the QEMU emulator will start.  Using F12, a menu will appear, the flash drive in it is number 2.
For Windows 7, two items are indicated when loading, you need to check first.  For XP there is only one option.
Windows 7 USB/DVD Download Tool
For the "seven" there is a program from Microsoft for creating a bootable USB flash drive. The utility is very simple and requires a minimum number of options:
- The ISO image is first requested.

- Then click USB.

- After that, specify the drive and click “ Copy».

- A traditional warning about information destruction will appear.

- Media preparation will then begin.

All that remains is to close the window after finishing the work.
UNetbootin
This program provides omnivorous utilities for creating a Windows/Linux bootable USB flash drive. A huge number of distributions are supported, while settings are kept to a minimum:

After completion, UNetbootin needs to be closed.
WinToFlash
Consider the following application to help you make a USB drive bootable and transfer the installer to it:
- When you launch WinToFlash for the first time, settings are configured.

- After clicking Next, you need to agree to the license and, if desired, configure the sending of statistics.

- Then choose paid or free version.
 You must wait until the license is activated. The free version will display advertisements.
- You will need to click Next again in the First Launch Wizard to proceed to the application.

- The main program window will open. To quickly prepare a USB flash drive, the first point is suitable.

- A special wizard will launch.

- After the welcome screen, you will be presented with the option to copy the contents of the disc/folder or ISO.

- Then select the file and flash drive to burn.

- After clicking Next, WinToFlash will display summary recording options.

- In the next step, a warning window will appear.

- You will also need to agree to the license.

- After this, data transfer to the flash drive will begin.

- You need to wait for the recording to complete.

Advanced mode is available in the main window under the second item (“Mul”):
- Here you can assemble a flash drive from several ISOs.

- When adding each image, you must specify its type.

- And also indicate the path to the ISO.

- After adding, the image will appear in the project.

- The Start button will start recording.

- When finished, you can close the program. Finally, she will offer to buy a license.

WinToBootic
A miniature utility both in appearance and in available settings. Let's look at the principle of its operation:
- The main window shows only three controls.
 On the left you can select the desired USB storage device. The file system and available space are displayed. It is better to check the box for quick formatting; this will reduce preparation time. If problems arise with the flash drive after recording, you can use full formatting. The element on the right is intended to indicate the image file. You can select it through the standard dialog or simply drag the ISO into the dotted area. After selecting the drive and ISO, click the Do it button.
- The program will check whether the user is confident in his actions.

- Then it will warn you about formatting again - because the data will be erased.

- Only after this will the ISO recording to the USB flash drive begin. If desired, you can stop the process using the " Stop", but in this case the flash drive will not work.

- After successful registration, the Thanks! button will appear. . To exit, you need to click on it and close the program itself (the cross is hidden in the upper left corner of the window).

How to check the media after recording
Only one of the described programs can fully check the boot from the resulting media -. Therefore, you can use it with the “ Test in QEMU».
If you are using another program, you can check using MobaLiveCD(site https://www.mobatek.net/labs_mobalivecd.html):
- The program will prompt you to select a drive to scan.

- After that, she will offer to create a disk file for the emulator so that the installation can be done on it. You can refuse (“No”) so as not to clog up your computer with unnecessary files.
 The exact same QEMU emulator is used as in WinSetupFromUSB.
- If the download starts, then everything is working.
- You can close the emulator and exit MobaLiveCD using the Exit button.
Please note that you must run it as an administrator.
In the main window, click " Run the LiveUSB». 
When the flash drive is ready and tested, you can use it to install the OS on any computer with a USB port.
Conclusion
There are a wide variety of programs for preparing media and creating a bootable flash drive. This article is devoted to an overview of such utilities to help better understand how they work. You can also choose a paid or free option. We hope our article will help you make the right choice.
MultiBoot USB. How to create a multiboot flash drive?
Multiboot flash drive (MultiBoot USB) is designed for installing operating systems Windows XP/2000/Vista/7/8
and loading recovery images and utilities directly from a USB drive.
Utilities included in the installation package of a multiboot flash drive:
- Acronis Disk Director & True Image— Working with hard drive partitions
Symantec Ghost v11.0 - Working with hard drive partitions
Windows XPE - Mini version
Windows 7PE - Mini version
Elcomsoft System Recovery Pro v3.0 Build 466— Password recovery and change
FreeDOS - Boot in command line mode, includes DOS-Navigator and VC
Universal boot disk v3.7— Access to NTFS partitions in MS-DOS
NT Password & Registry Editor— Changing the password and editing the registry
Active@ Boot Disk Professional v2.1— Recovering deleted files
QuickTech Pro v5.8 - Testing and diagnostics of hardware and its components
MemTest86+ v4.20 - Testing and diagnostics of RAM
MHDD v4.6 - Testing and diagnostics of hard drives
Victoria v3.52 - Testing and service of IDE and ATA HDD
HDD Regenerator v2011 - Eliminating damage (bad sectors) on HDD
Skins are located in the Boot folder. The default skins are “Moonlight” and “Rainbow”. When replacing skins, copy them to the Boot folder and write the name of the new skins in the files menu.lst and menu_2.lst in the line: “gfxmenu /Boot / Moonlight”.
Installation and work with the program.
To install the program on your computer, you need to run the multiboot flash drive installer - Multiboot flash drive.exe. After unpacking the SFX archive and finishing copying the files, the program will automatically start and the selector menu will open with a set of all the necessary utilities and programs for creating a multiboot flash drive. After installing the program, two shortcuts are created: on the “Desktop” and in the “Start/All Programs/Utilities” menu.
If the operating system Windows 7 or Windows Vista is installed on your computer, the program must be launched as an administrator.
1. Formatting a USB flash drive.
Before you start creating a multiboot flash drive, you need to format it.
Launch the HP USB Disk Storage Format Tool, select the file system NTFS (preferably) or FAT32, check the box for “Quick Format” and click on “Start”.

2. Install the grub4dos bootloader on a flash drive.
After formatting the flash drive, proceed to installing the grub4dos bootloader. Launch the Grub4Dos Installer utility, select “Disk” in the “Device Name” window, find your flash drive and click on “Install”.

If everything was done correctly, then in the window that opens, an inscription with the text “The MBR/BS has been...” will appear.
Press “Enter” and go to the next menu item.
3. Installing the Windows PE/XPE distribution kit on a flash drive.
Iso image of Windows XPE USB WIM using Daemon Tools, UltraISO or Alcohol. We launch the PeToUSB utility, below in the “Source Path To Built BartPE/WinPE Files” field we indicate the path to our virtual disk. Check the box only in the “Enable File Copy” window and click “Start”.

4.1. Installing the Windows XP distribution on a flash drive.
We mount an iso image of Windows XP onto a virtual disk using the Daemon Tools, UltraISO or Alcohol utility. We launch the WinSetupFromUSB utility, check the box in the “Windows 2000/XP/2003 Setup” window, specify the path to our virtual disk and click “GO”.

4.2. Installing the Windows 7 distribution on a flash drive.
We mount an iso image of Windows 7 onto a virtual disk using the Daemon Tools, UltraISO or Alcohol utility. We launch the WinSetupFromUSB utility, check the box in the “Vista / 7 / Server 2008 - Setup /PE/RecoveryISO” window, specify the path to our virtual disk and click “GO”.

5. Copy files and utilities to a flash drive.
Using the “Browse...” button, indicate the path to the flash drive and click “Eject”. To the question: “Do you want to replace an existing file?” click “Yes”.

After copying files to the flash drive is completed, it can be tested and checked for functionality.
Attention!!! Completing points 1; 2 and 5 are a must!!!
Any of points 3; 4.1 and 4.2, if you don't need it, you can skip it.
Testing a multiboot flash drive.
To test and see what we got, run the WinSetupFromUSB utility from the selector menu, check the box in the “Test in QEMU” window, click “GO” and enjoy

If everything went well, the bootable flash drive interface will look like this:

Distributions for bootable flash drive: https://yadi.sk/d/6nBtL8wDuW9ek
I hope this article helped you.
In contact with


 horoscope by year of birth")