nik34 sent:
It's been a while since we thought about this type of energy like heat. Let's compensate for this gap - we present the simplest homemade primus that can work on almost any type liquid fuel. And you can do it literally within ten minutes.
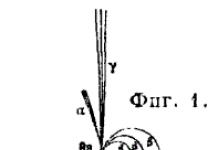
So: once upon a time, about twenty years ago, a most interesting article on making a primus stove fell into my hands. The first prototype was made and presented to a neighbor at the table while drinking you know what. Then other samples were made and also given as gifts or..., well, you get the idea. The article is taken from the magazine “Model Designer” No. 5 for 1991.


Almost everything is clear from the article in the magazine. On my own behalf I can add that it is long copper tube(I took it from both the refrigerator and the heat exchanger) and from tractors (I don’t know where). Length is about 40 centimeters. An asbestos cord is inserted into it, with a margin of about 10 cm at the edges. Next, we carefully bend the tube around a piece of pipe or wood.
I made the hole for the nozzle with a drill or a thin awl. The diameter is selected experimentally by eye, starting from a small one. I made the pan twice, then simply tilted the primus stove a little, doused the coil with fuel and set it on fire.
The filler neck was made on the side at the top of the tank - a regular nut, a bolt with a gasket made of gas-resistant rubber or paronite is screwed into it. During operation, I loosened the bolt a little, as if to let in air, but it worked without it. Extinguishing - the flame is extinguished and the structure is cooled to stop the evaporation of fuel. Flammable gases come out of the nozzle without fire and it is better not to approach it with a cigarette at this time until it cools down, as there have been precedents. I usually extinguished it in the river or with water (for this reason, the last sample is at the bottom of the Desna River and I can’t show it live, sorry).
The Primus is small and does not consume much (depending on the nozzle, time of year and fuel). If you put it in your backpack just like that, it can smell like fuel. I advise you to make a box with a lid for him out of some kind of tin can. From fuel - everything except firewood. I haven't tried it on a solarium.
Video: an example of making such a burner
The best thing in the world is something made with your own hands. It is, like nothing else, pleasing to the eye and extremely pleasant to use. This is explained by the fact that when using such things, we involuntarily remember the production process, which always leaves only pleasant memories, even if some difficulties arose in the process of creating the craft.
For those of us who love to relax in nature, in tents or without them, and at the same time appreciate warmth and comfort, there is one irreplaceable thing on a hike that each of us can easily do ourselves. Such a thing is a camping burner. This homemade product will help you heat a tent without exposing it to the risk of fire, heat up cold food, boil a kettle, and the like. In general, the thing is quite useful, interesting and, most importantly, easy to make and use.


The filler you choose should be placed tightly on the bottom of one of the jars, in a layer of 3-7 centimeters. Next, we put one can on top of the other so that they fit snugly against each other.
Additionally, we can solder them together, however, in this case the burner will be non-inventory, that is, the filler cannot be replaced, as a result of which it cannot be used more than a few times. Now we just have to punch small holes in the middle of our “lid”, as well as on the sides of the burner, like a gas stove.
Now we have reached the finish line - all we have left to do is set fire to our unit. To do this, it must be filled with a fuel and lubricant - alcohol or acetone is best. It will also work on gasoline or kerosene, but then you will have to get used to the constant soot. 

A primus is a small device used for heating small objects or preparing food, which is simply an irreplaceable thing in the country. By the way, a homemade primus stove is practically no different from its factory prototype - it can also be used to prepare and carry out various processes of heating parts. Often, such homemade primus stoves are very popular among avid fishermen who simply cannot imagine their fishing without tasty and aromatic fish soup in nature. Also, do not forget about lovers of hiking trips, for whom this device is simply an irreplaceable thing that helps them survive even in the most extreme conditions recreation. So, having acquired everything you need, you can safely begin the work process of creating a primus stove.
Initially, you need to prepare the beer cans by carefully sanding them so that all the design and paint are removed from them. After that, making an indent of 2 centimeters from the edge of each can, you need to cut off the bottoms. Glass wool is placed in the bottom of the jar, and then covered with the second bottom of the jar. This is done in such a way that the edges of the bottom, which is located on top, fit as tightly as possible inside the bottom. Now they need to be squeezed well together. As a result, they must be connected very tightly. For additional fixation, you can use regular electrical tape. If you don't have electrical tape at hand, you can replace it with tape. Taking a pushpin that has a long tip, five holes are made in the middle of the upper part of the resulting structure. Also, additional holes are made along the entire perimeter of the circle behind the rim, on which a beer can is usually placed.
Pre-prepared gasoline or kerosene is slowly and carefully poured upward so that it gets inside the device through five holes made in the center. During the process, you need to monitor the stream - it should be slow and uniform. In addition, it is best to pour fuel in small portions until liquid dangling begins to be felt inside the manufactured device. A special structure is made from wire, on which you can then place, for example, a cauldron of suitable size. To do this, on a wire about 60 centimeters long, marks of 25 centimeters are made from the end of one and the other side. After which it is bent down so that it resembles the letter “P”. It is turned over with its back down and bent forward again, making indentations of 10 centimeters on both sides of the existing bends.
Now the tips of the antennae, which stick straight down, must be lowered, making the device more stable. When using a lighter, it is recommended to warm up the bottom of the device thoroughly. As a rule, it is best to do this when the kerosene stove is installed on the ground or a metal sheet. The lighter is brought from above and then set on fire. A wire structure is installed above the primus. To check on top, you can, for example, place a pan with plain water and see how quickly it boils. Of course, this primus needs a constant supply of kerosene or gasoline, so when going camping long term, you must make sure that you have an additional container of fuel with you. Otherwise, burnt-out fuel can not only leave the entire team without food, but also greatly spoil the entire fighting spirit.
By the way, if there are no beer cans on the farm, you can assemble a so-called wood-burning primus stove. To make it, you take a large block in which a through channel is made. To facilitate the process, it is recommended to split the wood into several parts. The already split halves are brought together and pulled together tightly using strong wire. Next, the chock is installed on the fire pit. But to ensure normal air flow, it must be placed on stones, and straw and branches laid underneath. Now you can safely light a fire and use a homemade primus, which in its functionality is practically in no way inferior to its previous homemade version, and even more so to a factory-assembled primus. So, by spending a little time and effort, you can acquire this device, which is necessary for the household and outdoor trips.
Heating device is necessary for each of us. Especially if he has small size, then it can be used not only at home, but also outdoors, which will undoubtedly appeal to fans of hiking, camping, fishing, and so on. The mini burner will easily fit in a bag or backpack. A mini burner will be useful for those who take only the most necessary things with them on a hike, since it is smaller in size than ordinary matches.
Making a mini Primus in the video:
In order to make a mini burner or primus at home, we will need absorbent napkins or a sponge, a star jar, an awl, lighter gasoline or medical alcohol, sandpaper or a metal sponge.

Since we will make a burner from a star jar, it will turn out to be very small, which means that it can be called a micro burner.
The first thing we need to do is make holes with an awl around the shiny line of the jar. The distance between the holes should be approximately 2 mm.

After all the holes have been made, we need to take sandpaper or a metal sponge and clean the surface of the jar.

When the jar is cleared of paint, you should take an absorbent napkin and press bottom part jars into a napkin and cut out a circle along the resulting contour. The same procedure must be done twice to get two even circles. The circles need to be inserted into the jar.

Next, you need to pour lighter gasoline or medical alcohol into the lower part of the jar. When enough alcohol has been poured in, all that remains is to close the lid.

The mini primus or burner is ready. Using an absorbent cloth or sponge will prevent gasoline or rubbing alcohol from leaking out and evaporating quickly.

Attention!!! Follow safety rules when using a mini kerosene stove or burner. Do not open the burner until the fire has been extinguished, and do not keep flammable materials nearby.
In conclusion, here is some information that will be useful when using a mini burner: when using gasoline for lighters, the burner will burn for approximately 2 minutes 30 seconds. If you use 96 percent medical alcohol as fuel, the burner will burn for approximately 4 minutes 10 seconds. The height of the burner flame is approximately 11 centimeters.
This way you can make a mini burner using available materials.


